Creating/Editing Simple Slider Images on Homepage
This is a beginner topic. Little to no advanced knowledge is required.
Permission Level
Level 2 or Higher - See permission level document for details
Overview
We have two different homepage image styles. We have a very simple version with an image and caption but you can host three slides with an option to view them all using navigation, and a more advanced version with image, caption, button link and three pre-programmed buttons that are on every slide but only one is served to the end user in a session (you can have multiple slides active in your site but only one is shown to the end user randomly)
Simple Version

Advanced Version

These instructions are for the Simple Version.
The Franklin theme has a homepage slider that can host three primary slideshow images. This document will walk you through how to edit existing slides, and how to add new slides to your site.
Table of Contents
Note
Regardless of how many slides you load to your site, only three slides will show. The site will show the slides in random order. Each time a new visitor comes to the site, they will see a different set of three slides. If you only have three slides, all users will see the same slides.
Add New Slides
Step 1: Go to Content Editor
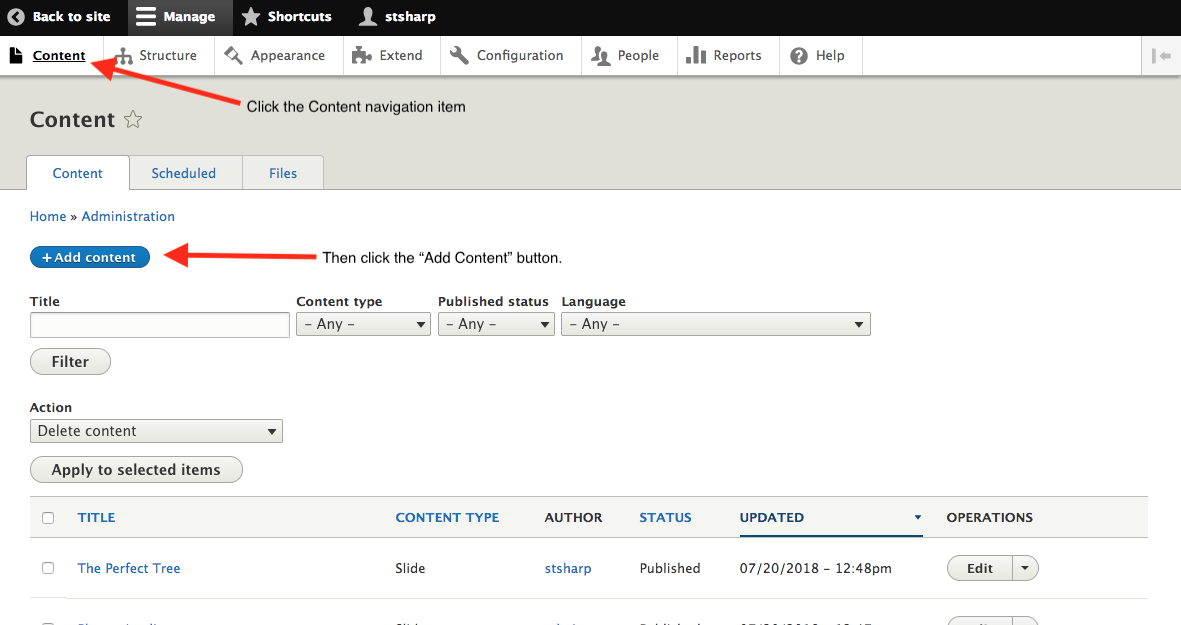
Click the top navigation button that says "Content", then click the blue "Add Content" button. This will take you to a page to choose which type of content you want to add as indicated in the next step. See screenshot below.
Step 2: Add a slide
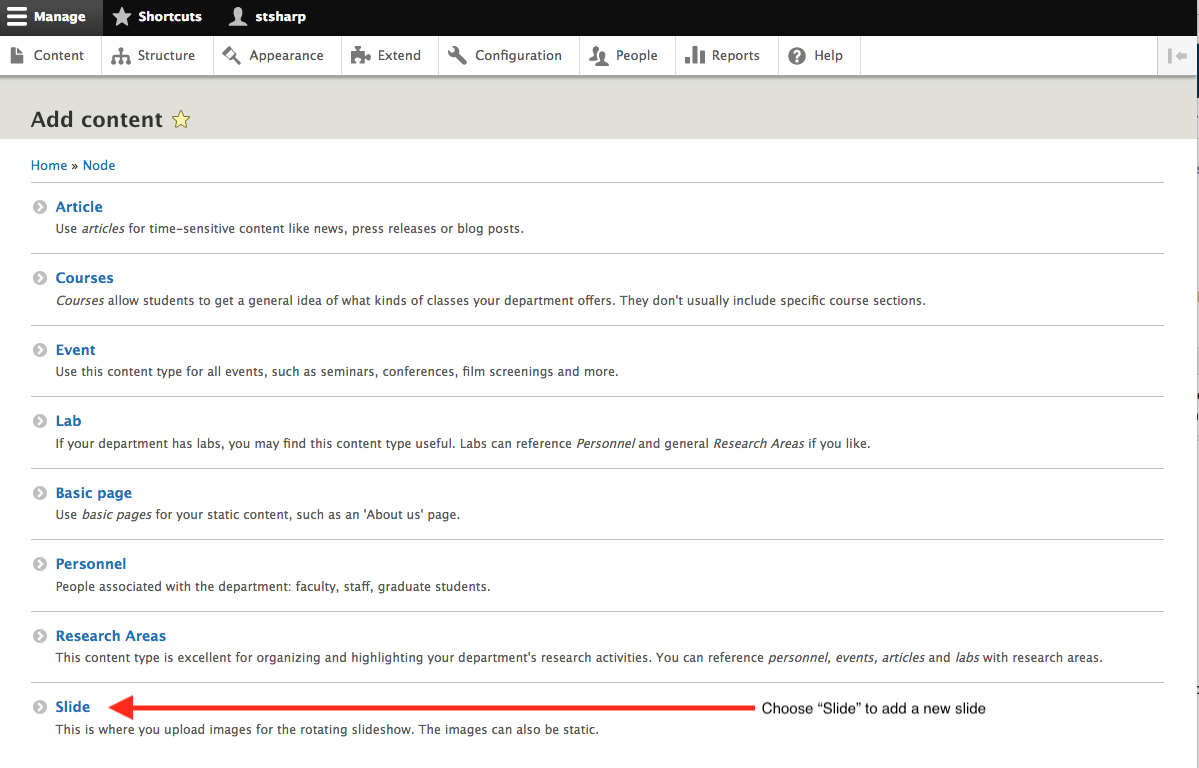
Next click "Slide" from the list of content types. See screenshot below.
Step 3: Upload your slide for just a photo (no text and link)
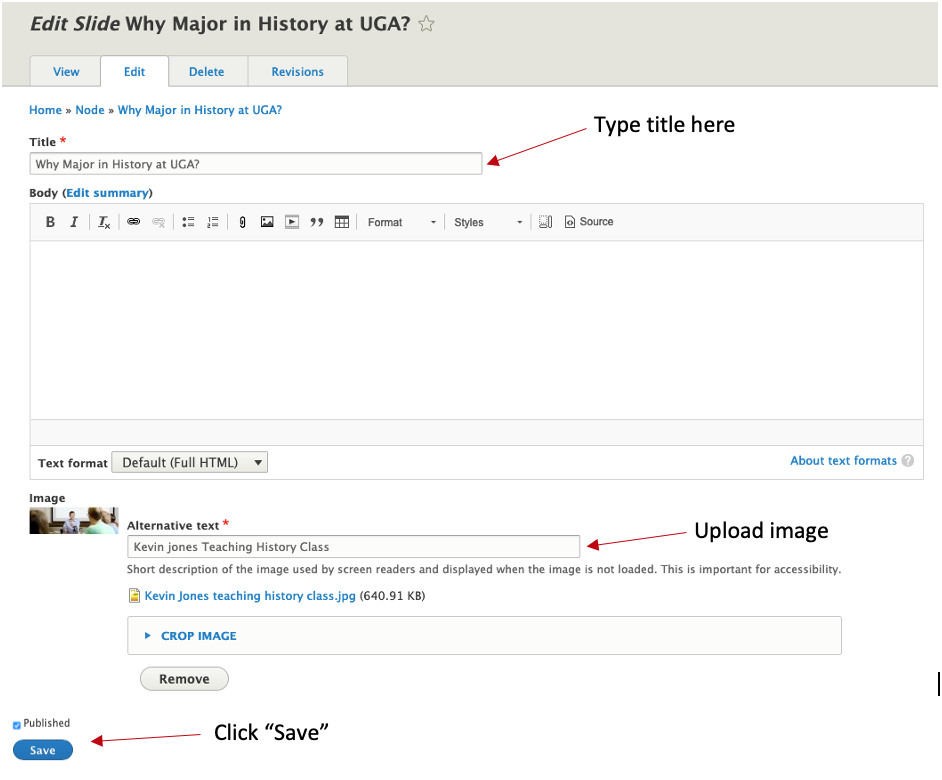
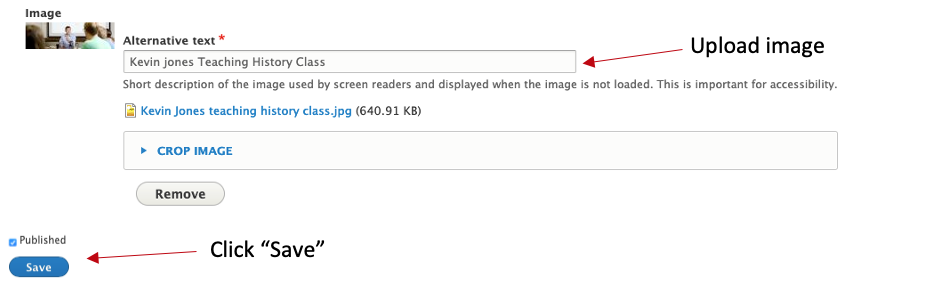
Enter a title for your slide (this will not appear on your photo). Under Image, click "browse" to locate the image on your computer, select the file and then click the blue "Save" button. See screenshot below.
Now you are done. The new slide should be present on your homepage now. Remember that a new slide will replace one of the other slides that might have been visible because only the three newest slides are visible.
OR
Step 4: Upload a Slide with a Title, Text and Link
If you want a slide with additional information and a link, follow the instructions below:
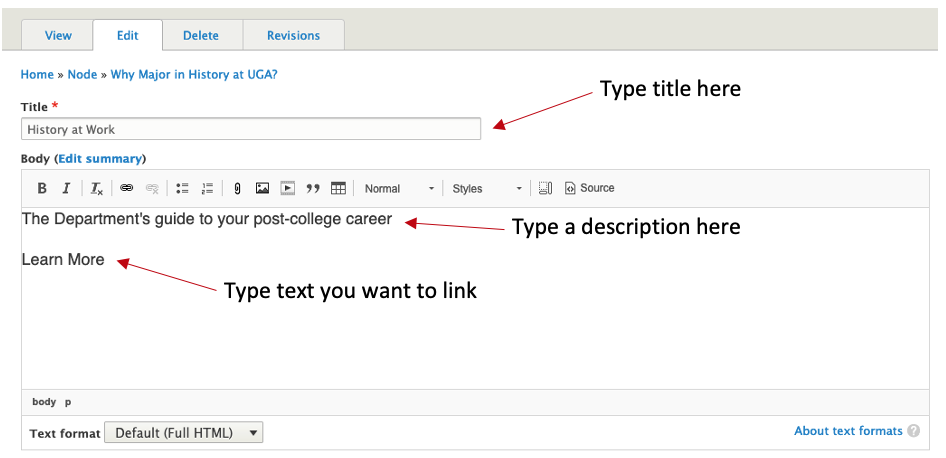
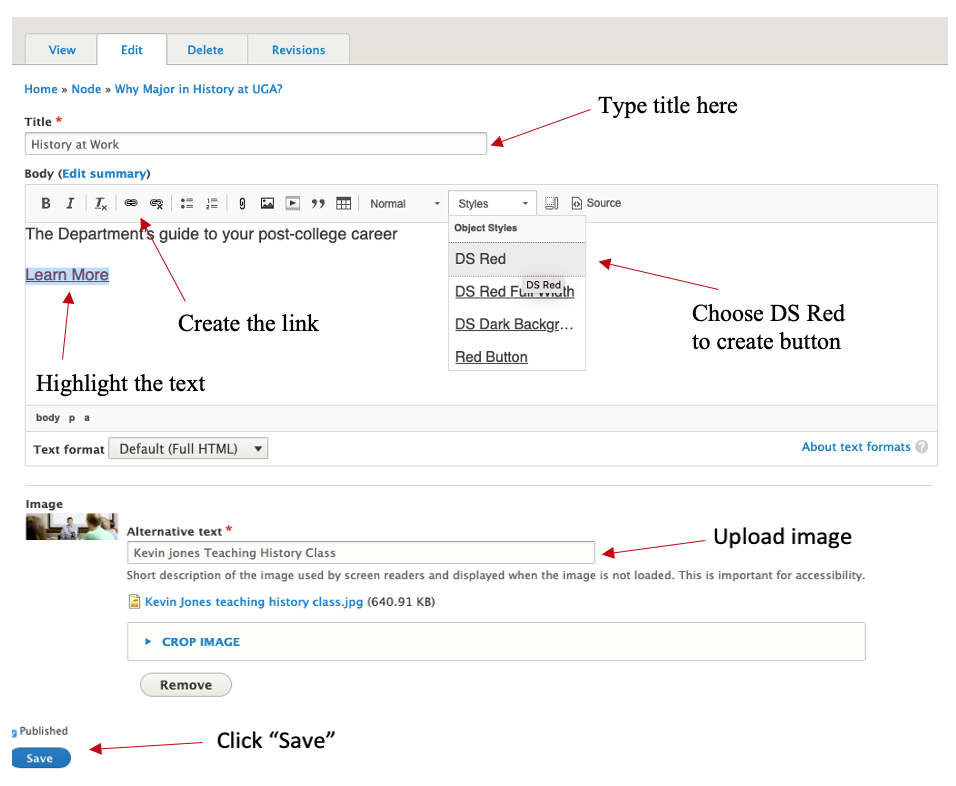
Enter a Title for your slide. In the Body section, add some descriptive text and “Learn More” (if you want a link).
Create a Learn More Button:
Select Learn More text, click on the insert link button and add the link. With the text still selected, go under Styles and select “DS Red”. You have now created a button for "Learn More."
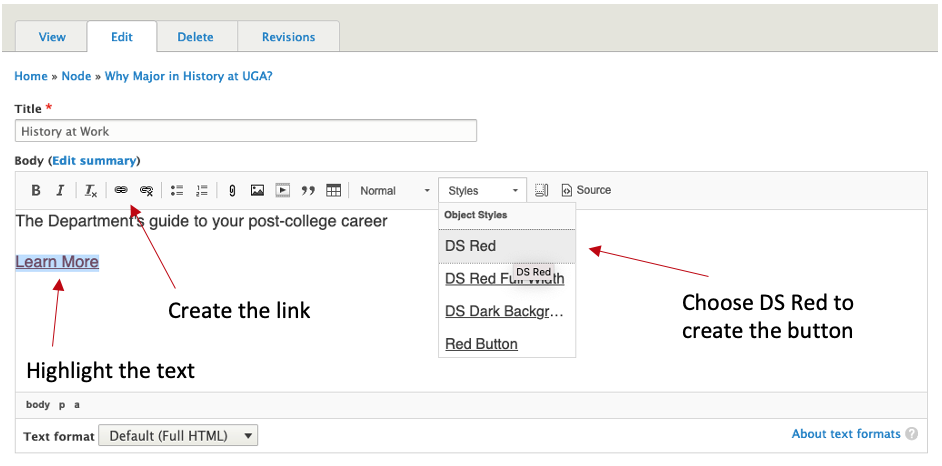
Under Image click "browse" to locate the image on your computer, then click the blue "Save" button. See screenshot below.
Your slide will now look like this:

Edit Existing Slides
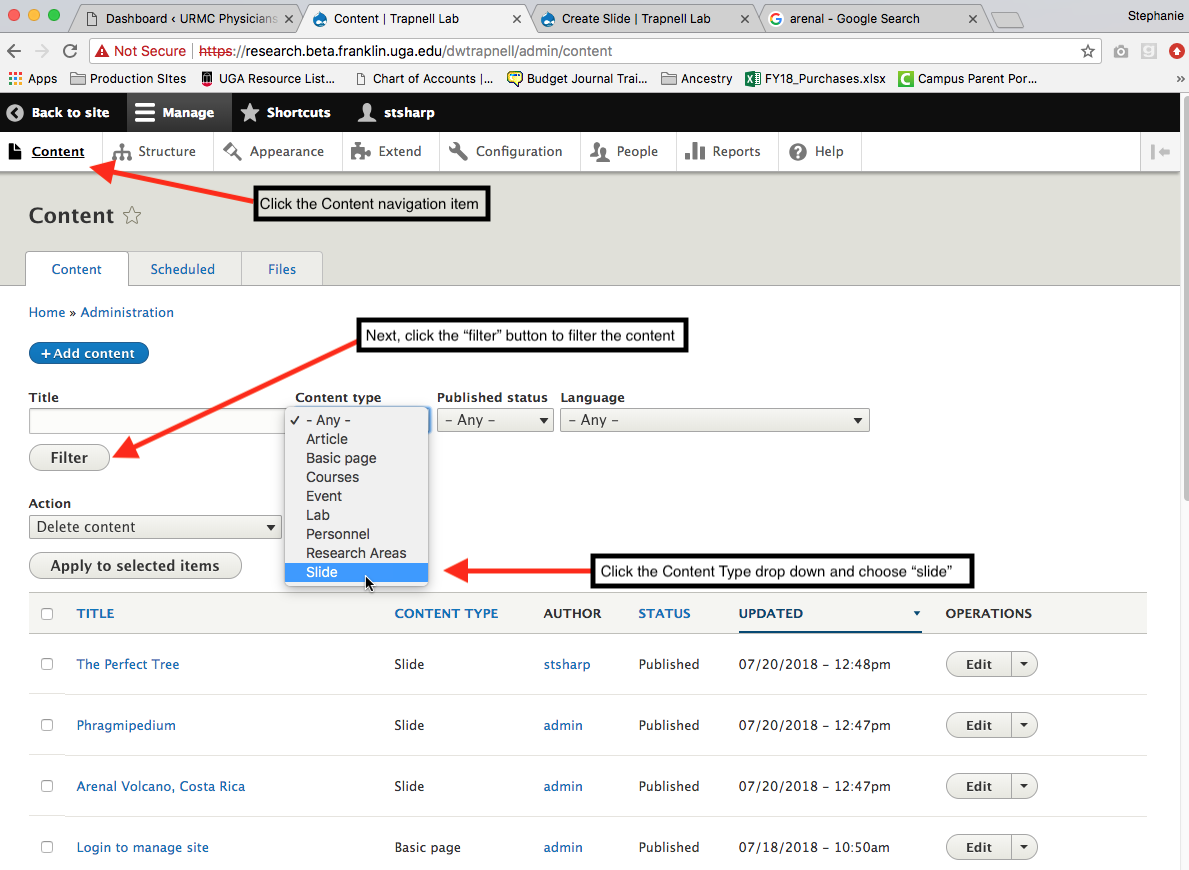
Step 1: Go to Content Editor
Click the top navigation button that says "Content", then filter the content to find your slides. Click the "Slide" option from the drop down, and click the "Filter" button. See screenshot below.
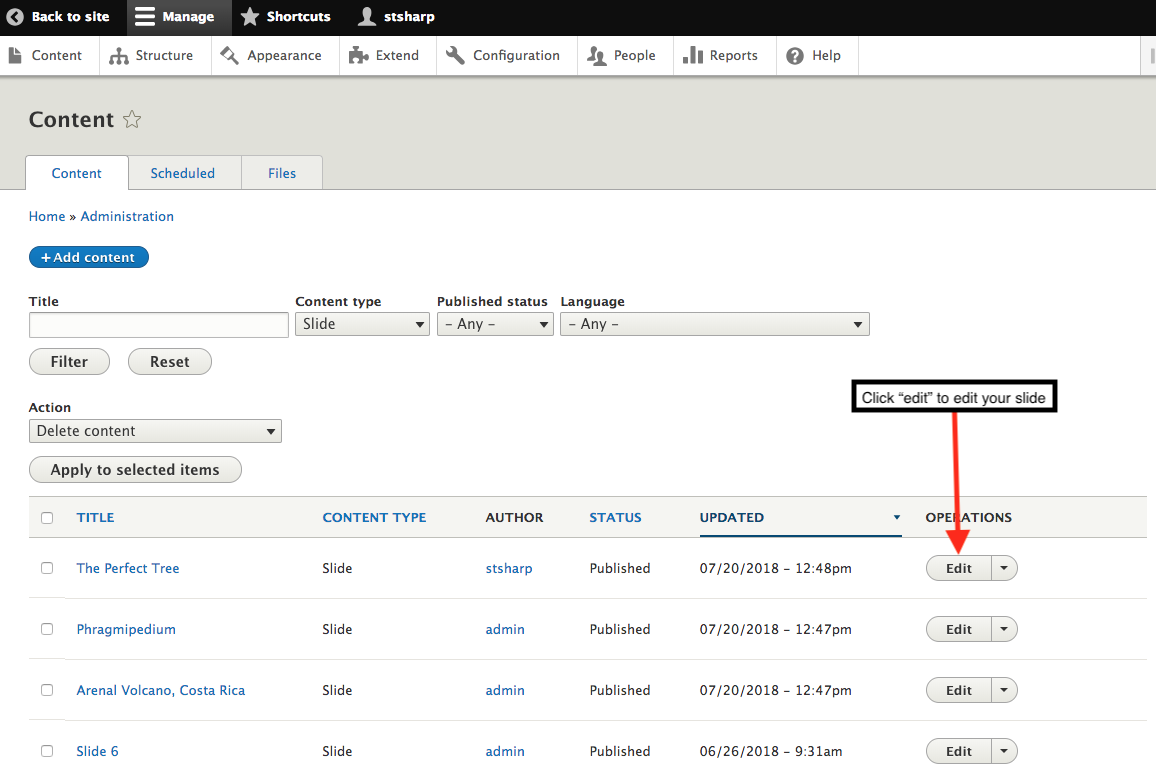
Step 2: Locate the slide you want to edit
Now you should see a list of all the slides currently on your site. To edit a slide, simply click the "edit" link next to the slide you want to edit.
Step 3: Edit the slide
Edit any parts of the slide you want to change and click the "Save" button. Remember, by editing this slide, it will put it in the first slide position. The web site shows the most recent three slides added or edited.
Related articles
To manage any part of your web site, you will have to be logged into the Drupal CMS. If you need help logging in, please review this login help document.
Monday - Friday 8:00 a.m. - 5:00 p.m. Homepage Directory Service Offerings Franklin OIT Status http://status.franklin.uga.edu/ Receive or Discontinue Status and Service Updates from Franklin OIT UGA/EITS Systems Status Pages https://www.facebook.com/uga.eits USG Systems Status PageContact the Franklin OIT Help Desk
Hours of Operation
Website Information
Systems Status Information
