Photoshop: Resizing and Optimizing Large Images
- Stephanie Lynn
- Laura P Rowan
- Tiffany Linhardt (Unlicensed)
This is an intermediate topic. You will need to possess some basic understanding and have some experience with Drupal content editing.
Recommended Tool
This documentation is demonstrating the use of Adobe Photoshop CC (but it will also be very similar in older versions of photoshop)
Resources
Practice Files: Peabody Photo
It's common to work with large print quality images or photographs that you want to use on the web. Many web site tools will automatically offer image resizing to conserve space on web servers. But occasionally you will come across a tool that uploads the image as is, without any compression or optimization. When this is the case, you may want to resize and optimize your images/photos before you upload them.
Step-by-Step Guide
Step 1: Adjust the Width and Height of Your Photo
Open your image and then choose "Image > Image Size" from the top menu.
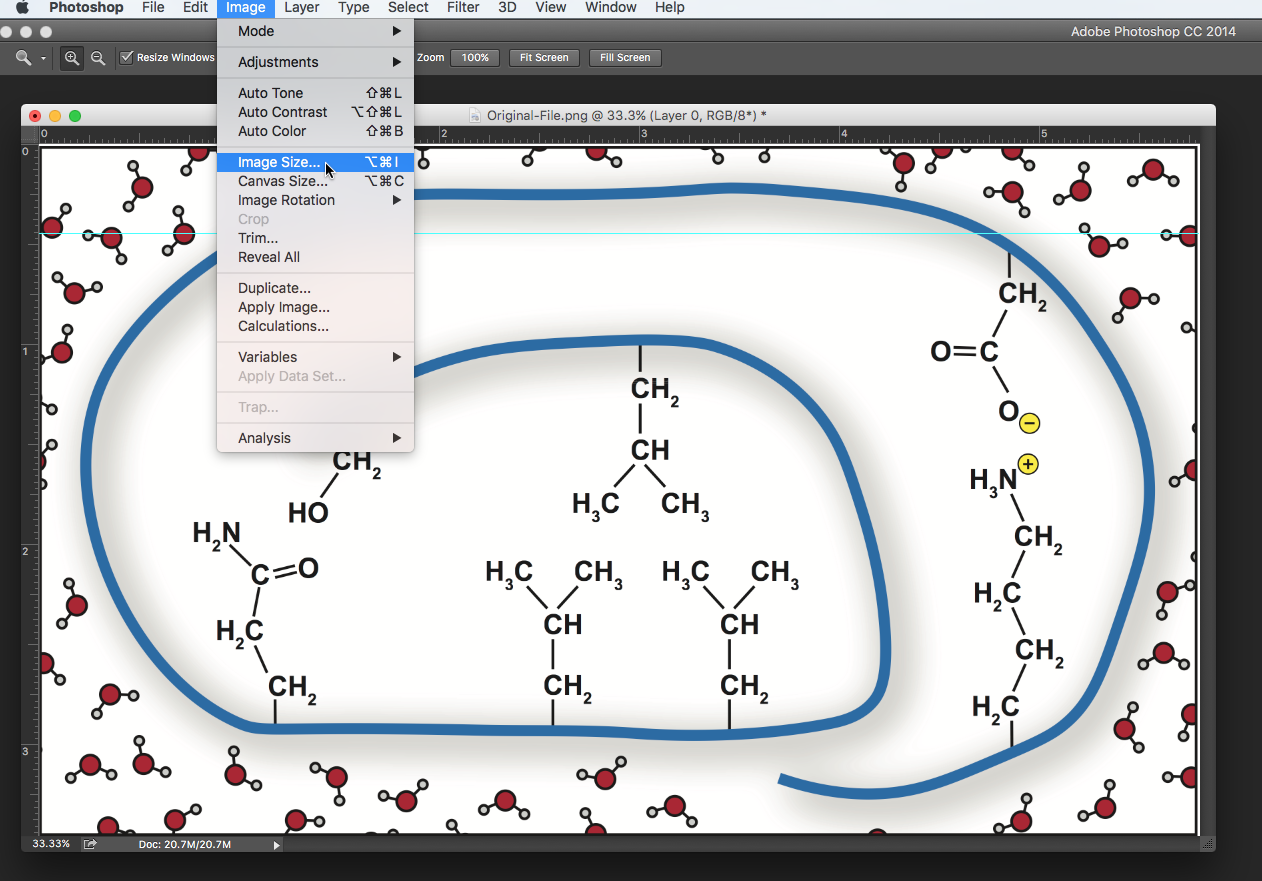
Make sure the Width and Height are indicated in pixels. Sometimes it may say inches or some other measurement. Just change it to pixels.
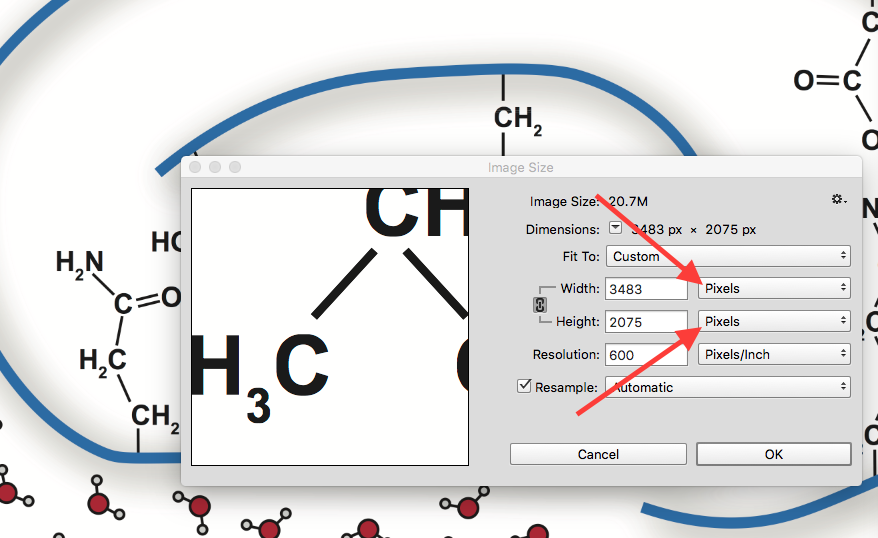
Then adjust the width of your image to the desired size. A good screen size for images displayed in pages (not for design purposes) is about 300 pixels on average. But you can make it whatever size you want. Try a few different sizes. Enter whatever size you want it to be in the "width" field. It will automatically adjust the height proportionally.
Click "OK". It may look really tiny on your screen after doing this because its not at 100% zoom level. You can increase the zoom level to 100% by clicking "view > 100%" from the top menu. If you find that the image looks too small, you can undo your changes by clicking "Edit > undo" from the top menu, and then try a different size. Keep in mind, whatever size it looks in photoshop at 100% zoom level is how it will look when you use it in any web site unless the tool you are using does additional cropping or resizing. But most likely you wouldn't be reading this document if the tool you are using does resizing for you!
Step 2: Save and Optimize
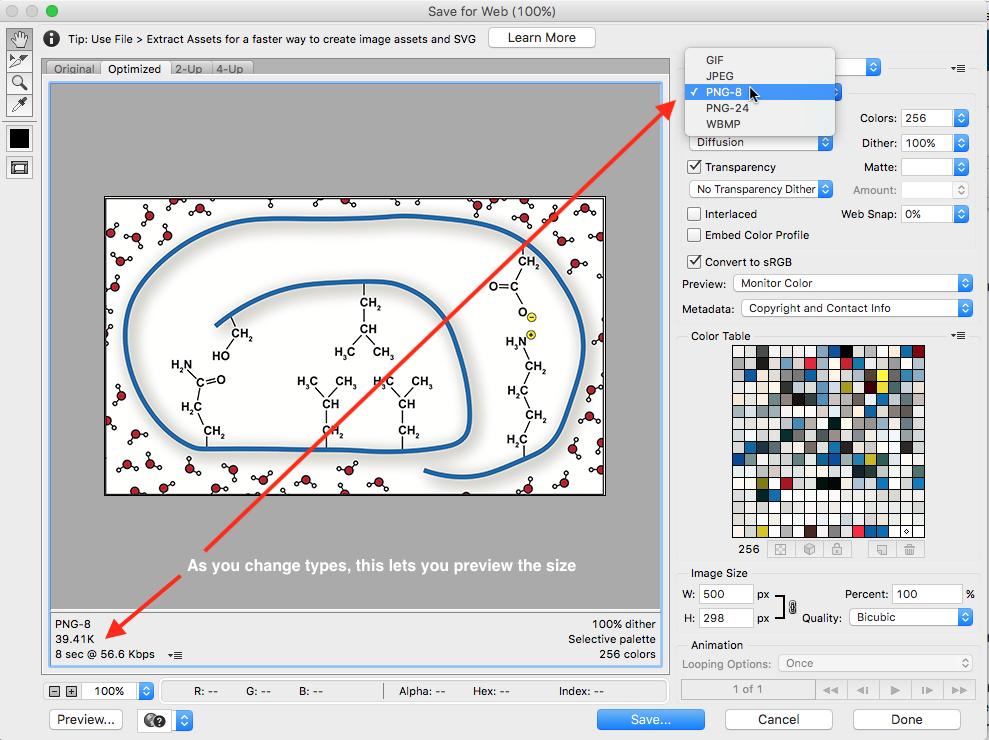
Choose "File > Save for Web (legacy)" from the top menu. Save for web does some additional optimization of the file.
Select the Preset image type. I recommend PNG-8 if the image is a drawing or diagram, and PNG-24 if it is a photograph. PNG-8 will always be a smaller size but it only has a 256 color palette (like gif's) while PNG-24 has a true color variant (like jpgs) but will have a larger file size.
As you change file types, you can preview the new file size (see below)
Then click "Save"
Then look at your two files in your file browser - the original file and the new file and compare the sizes. You should see a vast difference in the file sizes because you have not only resized the image, but you have optimized it for web use.
Step 3: Go Forth and Use Your Image
Try adding this new resized image to your web site or project and see if it works for you.
Related articles
To manage any part of your web site, you will have to be logged into the Drupal CMS. If you need help logging in, please review this login help document.
Monday - Friday 8:00 a.m. - 5:00 p.m. Homepage & Directory Service Offerings Franklin OIT Status http://status.franklin.uga.edu/ Receive or Discontinue Status and Service Updates from Franklin OIT UGA/EITS Systems Status Pages https://www.facebook.com/uga.eits USG Systems Status PageContact the Franklin OIT Help Desk
Hours of Operation
Website Information
Systems Status Information
