Photoshop: Correcting Minor Blemishes in Photos
This is an intermediate topic. You will need to possess some basic understanding and have some experience with Drupal content editing.
Recommended Tool
This documentation is demonstrating the use of Adobe Photoshop CC (but it will also be very similar in older versions of photoshop)
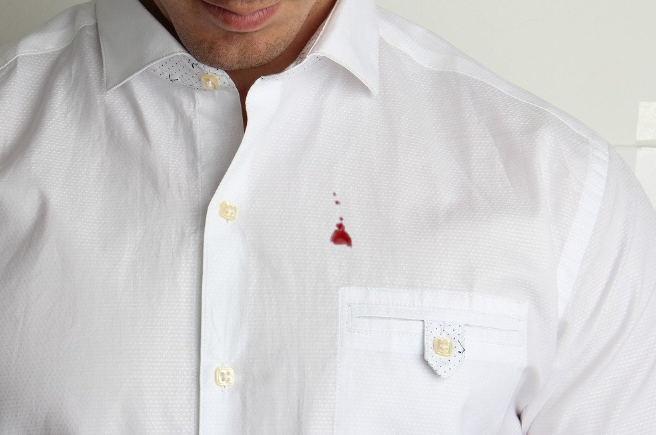
Sometimes there might be blemishes in images that you want to fix. Perhaps you would like to remove skin blemishes in photographs, or objects that clutter up a scene, or a stain on someone's shirt, etc.
Step-by-Step Guide
Resources
Practice Files: Man with Stained Shirt
Step 1: Open the Image
Open your image by selecting "File > Open" from the file menu and locate the image from your computer. If you need more guidance, use these instructions
Step 2: Choose Spot Healing Brush Tool
This tool looks like a bandaid with a dotted half circle around it like this:

If you don't see it on your toolbar, its probably hidden under another tool - just click on each icon and hold down, to see if you find it under any of the default tools. It may be in different places on different computer setups.
Step 3: Start Touch Ups
Once you have selected the Spot Healing Brush Tool, notice the options bar change. You should have an option for size of brush. Depending on how big or small an area you are touching up, you may want to adjust the size of the brush. I am using a size 41, normal mode, content aware.

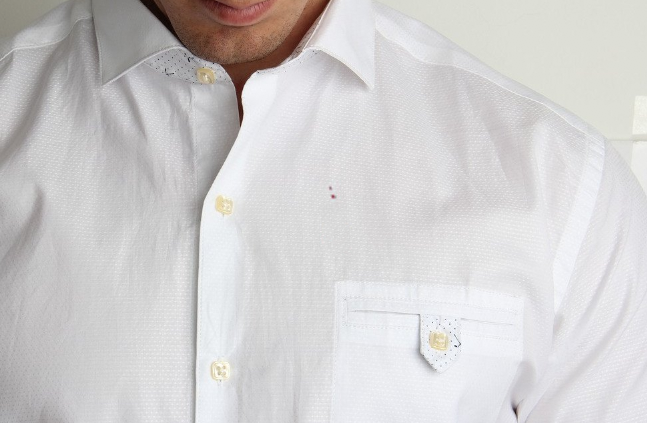
Now click the image where the red stain once. You will see it start to disappear. Click again, and again until all of the red is gone.
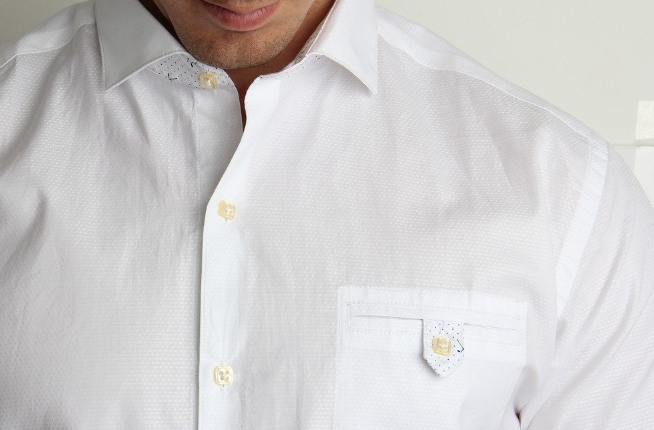
Here are the different phases of the image as I was correcting it - it took me 5 clicks to get the entire stain out.


Step 4: Zoom in to Check the Quality
It's always good to zoom in to make sure that you got the stain completely out, and to make sure if there was a pattern you were correcting on top of, that it is well blended. If you find a disturbed pattern, you might want to undo your work and redo with a smaller, more precise brush.
After zooming in, this is what the area looks like. It's not perfect but it's pretty dang good!
Also feel free to experiment with the other Option settings for the spot healing brush tool.

Step 5: Save Your Image
Step 6: Go Forth and Use Your Image
Related articles
To manage any part of your web site, you will have to be logged into the Drupal CMS.
If you need help logging in, please review this login help document.
Contact the Franklin OIT Help Desk |
Hours of Operation |
Monday - Friday 8:00 a.m. - 5:00 p.m. |
Website Information |
Homepage Directory Service Offerings |
Systems Status Information |
Franklin OIT Status http://status.franklin.uga.edu/ Receive or Discontinue Status and Service Updates from Franklin OIT UGA/EITS Systems Status Pages https://www.facebook.com/uga.eits USG Systems Status Page |
