Github Pages Setup
- Stephanie Lynn
- Michael Hill
GitHub pages is a free service Franklin OIT has used to provide individuals needing a more custom or DIY approach to managing their own content and website. Franklin OIT provides advice and some basic documentation on how to setup a free account and website hosting but does not provide any additional services or support for the solution outside of this document.
Help Documents
Github pages is a good solution for someone with a standard HTML site without any special programming needs.
Step 1: Create Account.
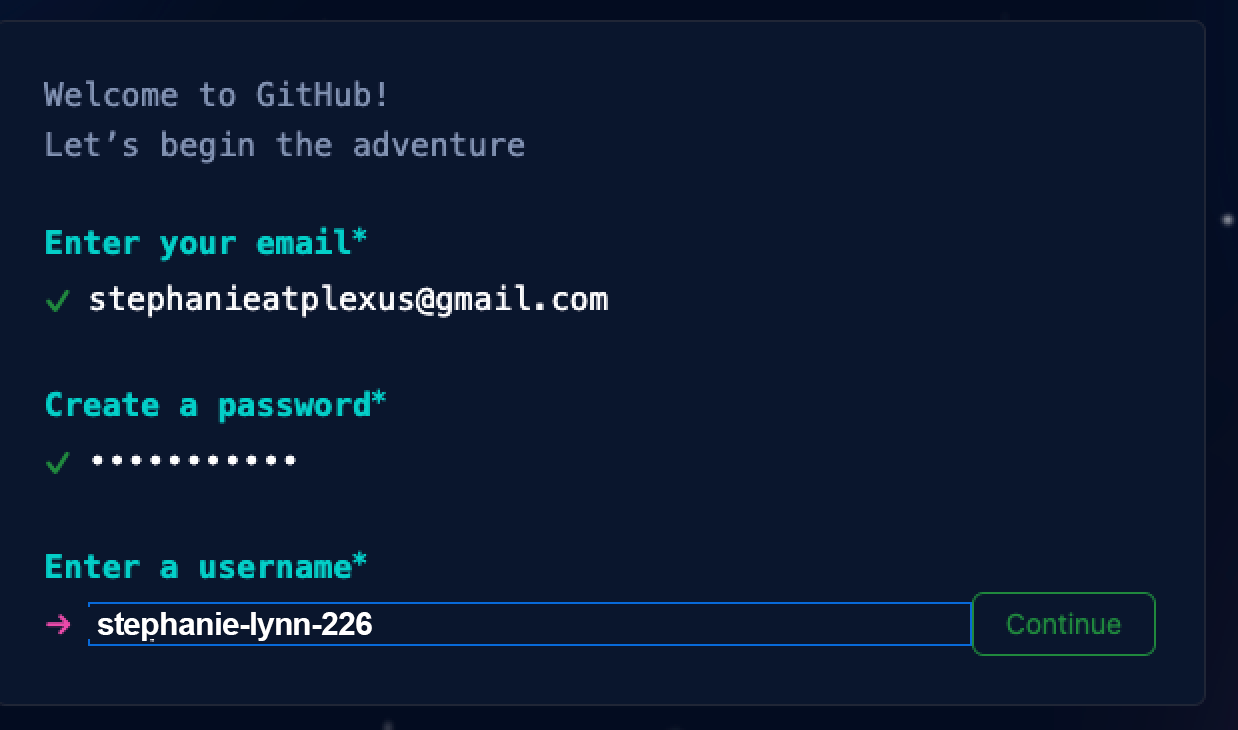
Go to github.com and click the "Sign up" link in the top right corner.
See screen capture below for the information you will need to provide. Make the username relevant to your organization. Notice my username is stephanie-lynn-226. This will be important later.
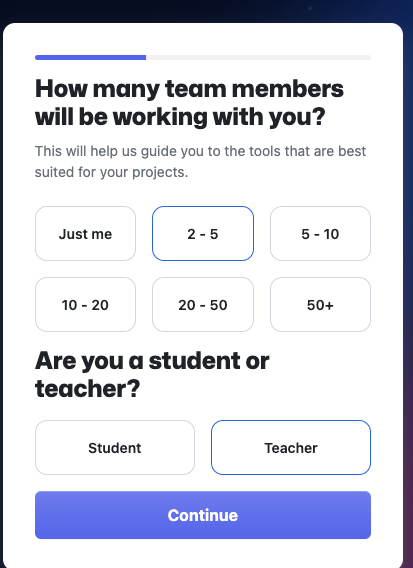
Step 2: Choose Account Type
We recommend choosing "teacher" with 2-5 members so that you will be able to collaborate your account with a member of our support staff so we can assist with moving the files from your old site to Github pages.
Step 3: Choose Account Level
We have found that the free account provides everything you need to host a single HTML web site.
.png?version=2&modificationDate=1683636083000&cacheVersion=1&api=v2&width=700&height=622)
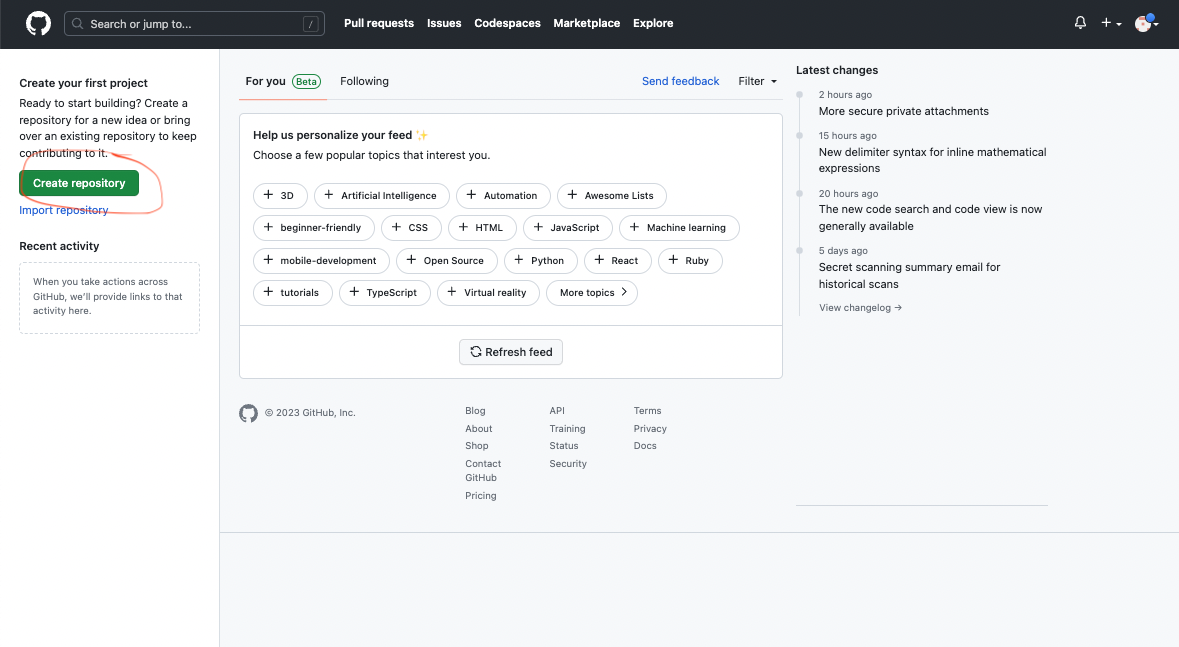
Step 4: Create your repository
Click the Green "Create Repository" button.
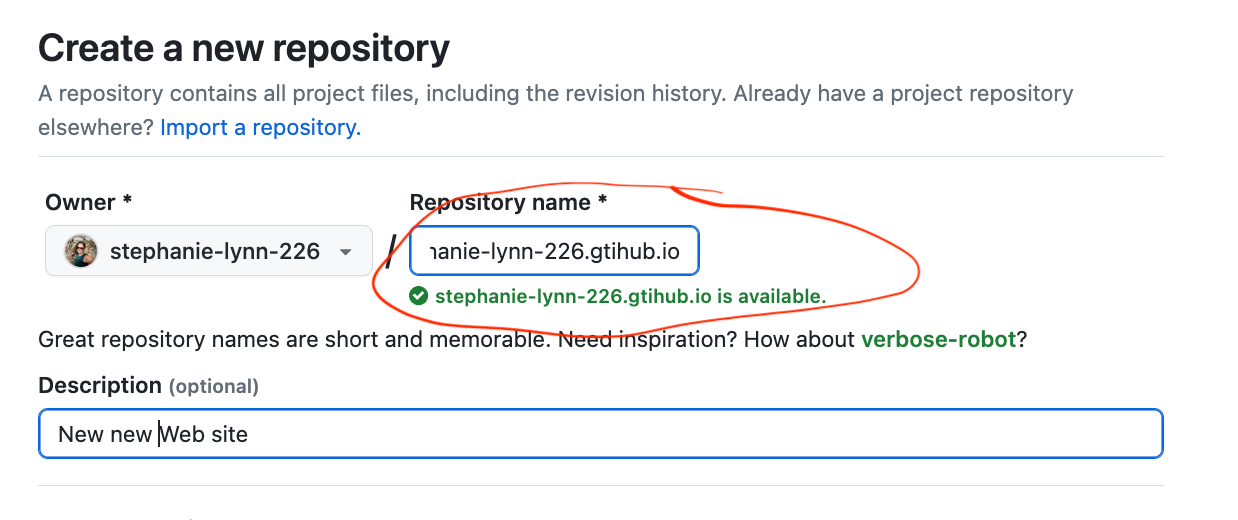
Next, create a name for your repository. This step is very important. You will need to name your repo such that it will need to have your username in it.
In this example, my username is stephanie-lynn-226. I named my repo "stephanie-lynn-226.github.io." If you do not name your repo with username.github.io, the files will not be viewable via web browser.
Step 5: Add all of your web files to the repository
Here is documentation provided by github. We are not able to provide technical support for this part of the process
Step 6 (optional): Setting up custom domain
Please submit a Franklin OIT Helpdesk ticket if you are interested in a custom domain. We will need to work with the Office of Information security to configure the domain and have them perform a security penetration test of the website prior to it being completed. This configuration may also require a CESS to be completed since GitHub is a cloud service.
- Create necessary DNS entry as a CNAME and point it to:
<user>.github.io - DNS must fully propagate before GitHub will allow the domain to be added
- In the Git Repo, navigate to Settings → Code and Automation: Pages → Custom Domain
- Enter the domain and save
After the txt record and cname DNS changes are complete there is one more step
Go to your repo and click "settings", and then choose "pages"
![]()

Enter your custom domain here and save. It will take about 30 minutes to fully provision

Need additional support?
If you have a question that has not been answered in our help documentation or FAQ pages, please click the "Submit a ticket" button to contact the Franklin OIT Help Desk and we will be happy to help!
Monday - Friday 8:00 a.m. - 5:00 p.m. Homepage & Directory Service Offerings Franklin College IT News Franklin OIT Status http://status.franklin.uga.edu/ Receive or Discontinue Status and Service Updates from Franklin OIT UGA/EITS Systems Status Pages https://www.facebook.com/uga.eits USG Systems Status PageContact the Franklin OIT Help Desk
Hours of Operation
Website Information
Systems Status Information
