Photoshop: Introduction to Application Interface
- Stephanie Lynn
- Laura P Rowan
This is a beginner topic. Little to no advanced knowledge is required.
Permission Level
Level 1 or Higher - See permission level document for details
Recommended Tool
This documentation is demonstrating the use of Adobe Photoshop CC (but it will also be very similar in older versions of photoshop)
Here's what the Photoshop interface looks like once we've opened an image or created a new photoshop image.
See the image below for some highlights on relevant parts of photoshop. Not all of these tools/palettes may be visible when you first open photoshop for the first time.
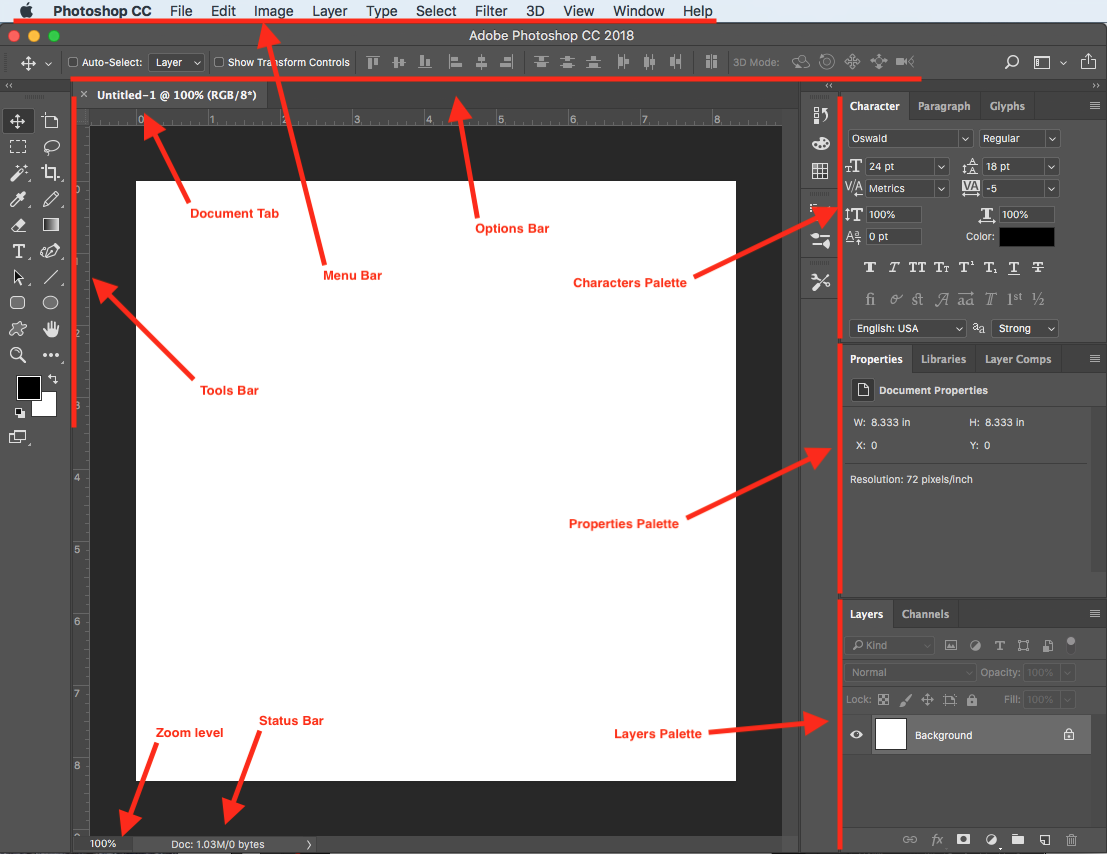
The current zoom level is displayed, just like it is in the document's tab. You can type a different percentage in that field to change the zoom level.
To the right of the zoom level is the Status Bar. By default, the Status Bar displays the color profile of the image. In my case, it's Adobe RGB (1998). Yours may say something different, like sRGB IEC61966-2.1. You can click on that arrow next to the status bar to reveal other document information like width/height, resolution or color image.
The Toolbar (also known as the Toolbox or the Tools palette) is where Photoshop holds all of its tools. You'll find it along the left of Photoshop's interface. There's tools for making selections, for editing and retouching images, for painting, adding type or shapes to your document, and more.
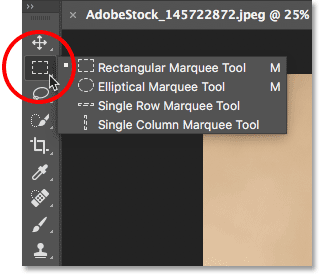
Photoshop includes lots of tools. In fact, there are many more tools than what we see. Most of the tools in the Toolbar have other tools nested in with them in the same spot. Click and hold on a tool's icon to view a menu of the other tools hiding behind it.
For example, by default, the Rectangular Marquee Tool is selected. It's the second tool from the top. If I click and hold on the Rectangular Marquee Tool's icon, a fly-out menu appears. The menu shows me that the Elliptical Marquee Tool, the Single Row Marquee Tool and the Single Column Marquee Tool can also be selected from that same spot.
Directly linked to the Toolbar is Photoshop's Options Bar. The Options Bar displays options for whichever tool we've selected in the Toolbar. You'll find the Options Bar along the top of the interface, just above the document window.
Along the very top of Photoshop's interface is the Menu Bar. The Menu Bar is where we find various options and commands, all grouped into categories. The File menu, for example, holds options for opening, saving and closing documents. The Layer menu lists options for working with layers. Photoshop's many filters are found under the Filter menu, and so on. We won't go through every category and menu item here, but we'll learn all about them in future lessons as they become important. Note that the "Photoshop CC" category on the left of the Menu Bar in the screenshot is only found in the Mac version of Photoshop.

Along the right of Photoshop's interface is where we find the palettes. These tools give us access to all sorts of commands and options, and there are different palettes for different tasks. The most important palette is the Layers palette. It's where we add, delete and work with layers in our document.
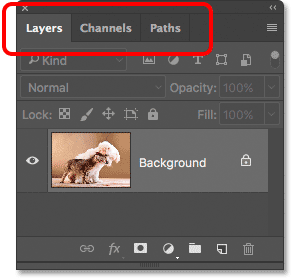
To save space on the screen, Adobe groups related palettes together. For example, let's look at the Layers palette. Just like the Document window, each palette has a tab at the top which displays the palette's name. Notice, though, that there are two other tabs to the right of the Layers tab. One says Channels and the other says Paths. These are other palettes that are nested in with the Layers palette in the same palette group. The name of the palette that's currently open in the group (in this case, the Layers palette) appears brighter than the others. Just click on the tabs of the palette groups to use the other palettes.
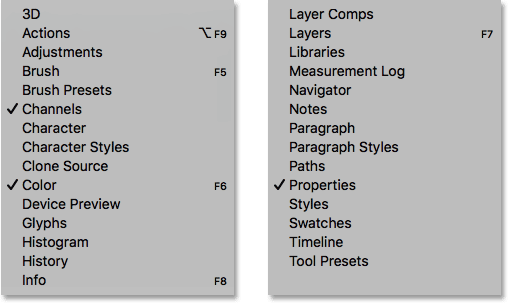
By default, only a handful of palettes are displayed at first. But there are many more palettes available to us in Photoshop. You'll find the complete list of palettes under the Window menu in the Menu Bar:
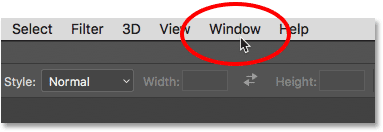
The palettes are listed in a long, single column. I've split the column in half here just to help it fit better on the page. To select a palette, click on its name in the list. A checkmark to the left of a palette's name means that the palettes is already open. Selecting a palette that's already open will close it.
To manage any part of your web site, you will have to be logged into the Drupal CMS.
If you need help logging in, please review this login help document.
Contact the Franklin OIT Help Desk |
Hours of Operation |
Monday - Friday 8:00 a.m. - 5:00 p.m. |
Website Information |
Homepage & Directory Service Offerings |
Systems Status Information |
Franklin OIT Status http://status.franklin.uga.edu/ Receive or Discontinue Status and Service Updates from Franklin OIT UGA/EITS Systems Status Pages https://www.facebook.com/uga.eits USG Systems Status Page |
