Managing Content in Blocks
Del Gray
Laura P Rowan
Stephanie Lynn
This is an advanced topic. You will need to possess a good understanding of HTML, and have significant experience with Drupal content editing.
Overview
This document is to show unit administrators how to manage content in the blocks in your site.
Table of Contents
What are blocks?
Blocks are boxes of content rendered into an area, or region, of a web page that can be displayed in regions (such as footer or sidebar) on your page. There are several blocks throughout your website so you can display information in a way that looks stylish and organized.
Editing Content in Blocks
Step 1: Find the region you want to edit.
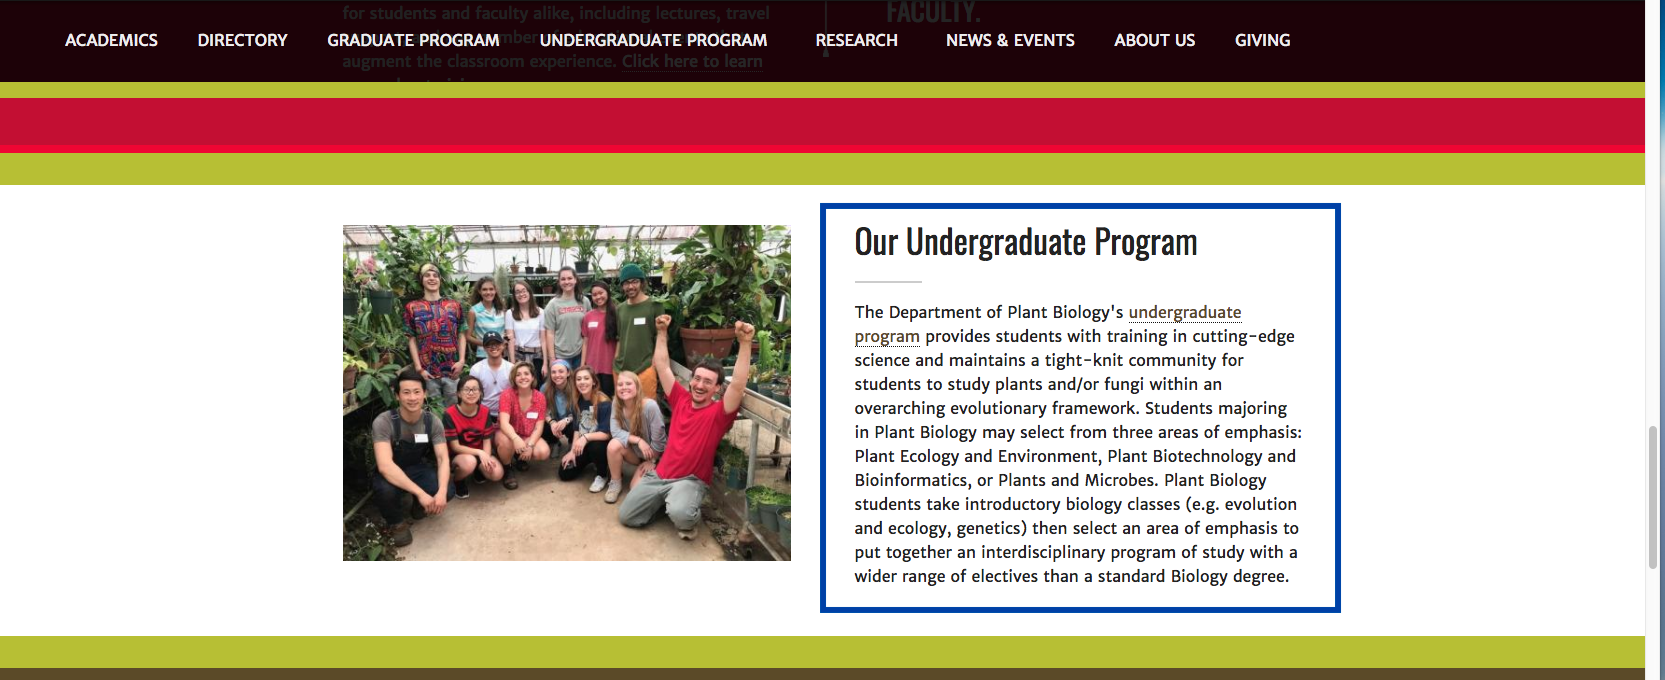
Please use this diagram to reference the different regions in your homepage. For this example, we're going to try and edit the Tertiary Right Column, the one labeled 'Our Undergraduate Program'.
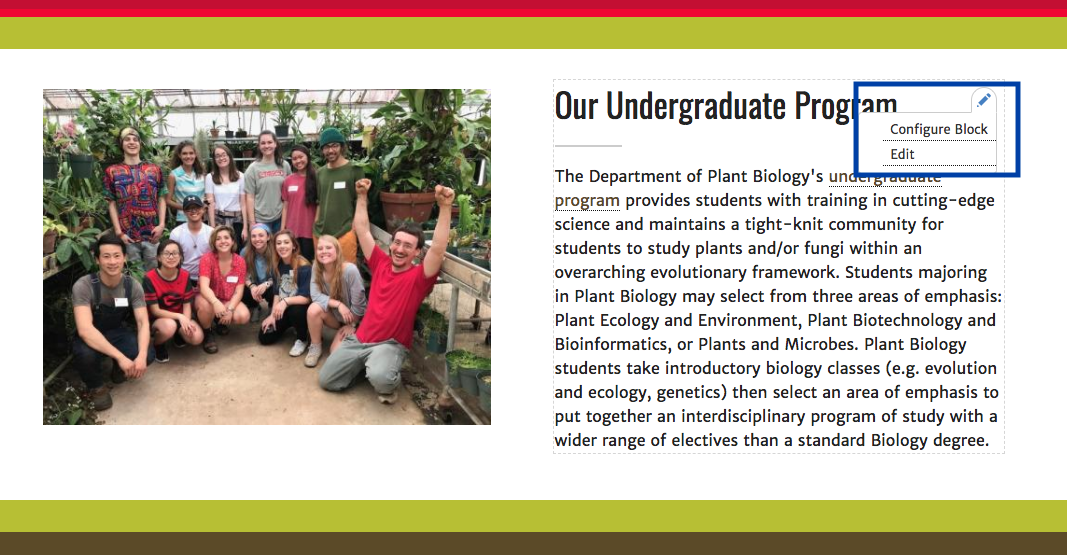
Step 2: Hover over the top right corner of the block until you see a little pencil pop up. Click it.

Once you click the pencil, it should give you the option to 'Configure block' or 'Edit'.
Step 3: Click on 'Edit'.
Step 4: Edit the content!
After that, you can just replace the content with whatever you need to.
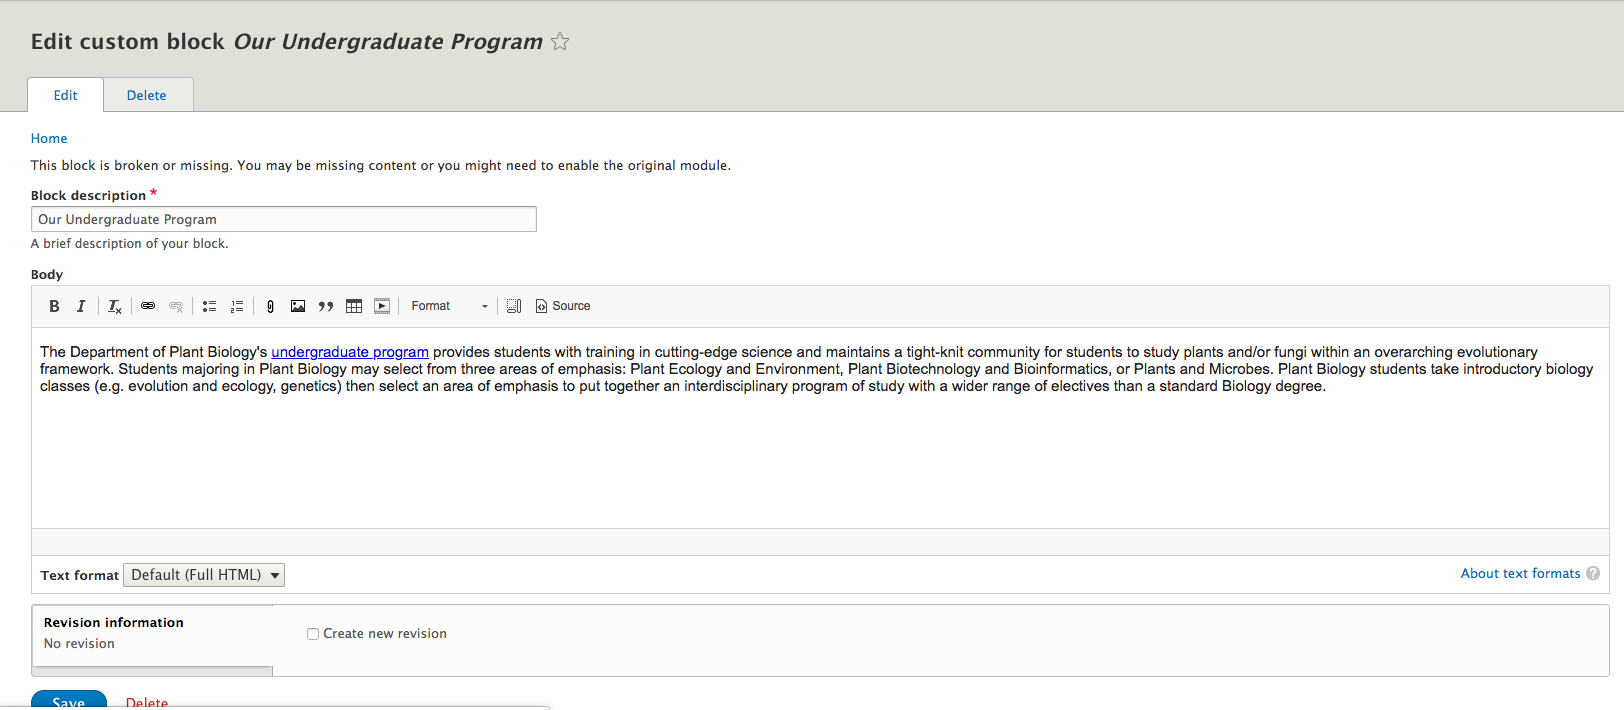
Step 5: Click Save!
And that should be it! The content should be edited.
Adding Other New Content to Blocks
You just want to add different content into your blocks because it's a new semester, and you don't want to delete the content that's already there because you might want to use it later.
Step 1: Go to the Block Layout page.
You get there by clicking on Structure in the administrative menu, and then Block Layout.


You should come across a page like this:
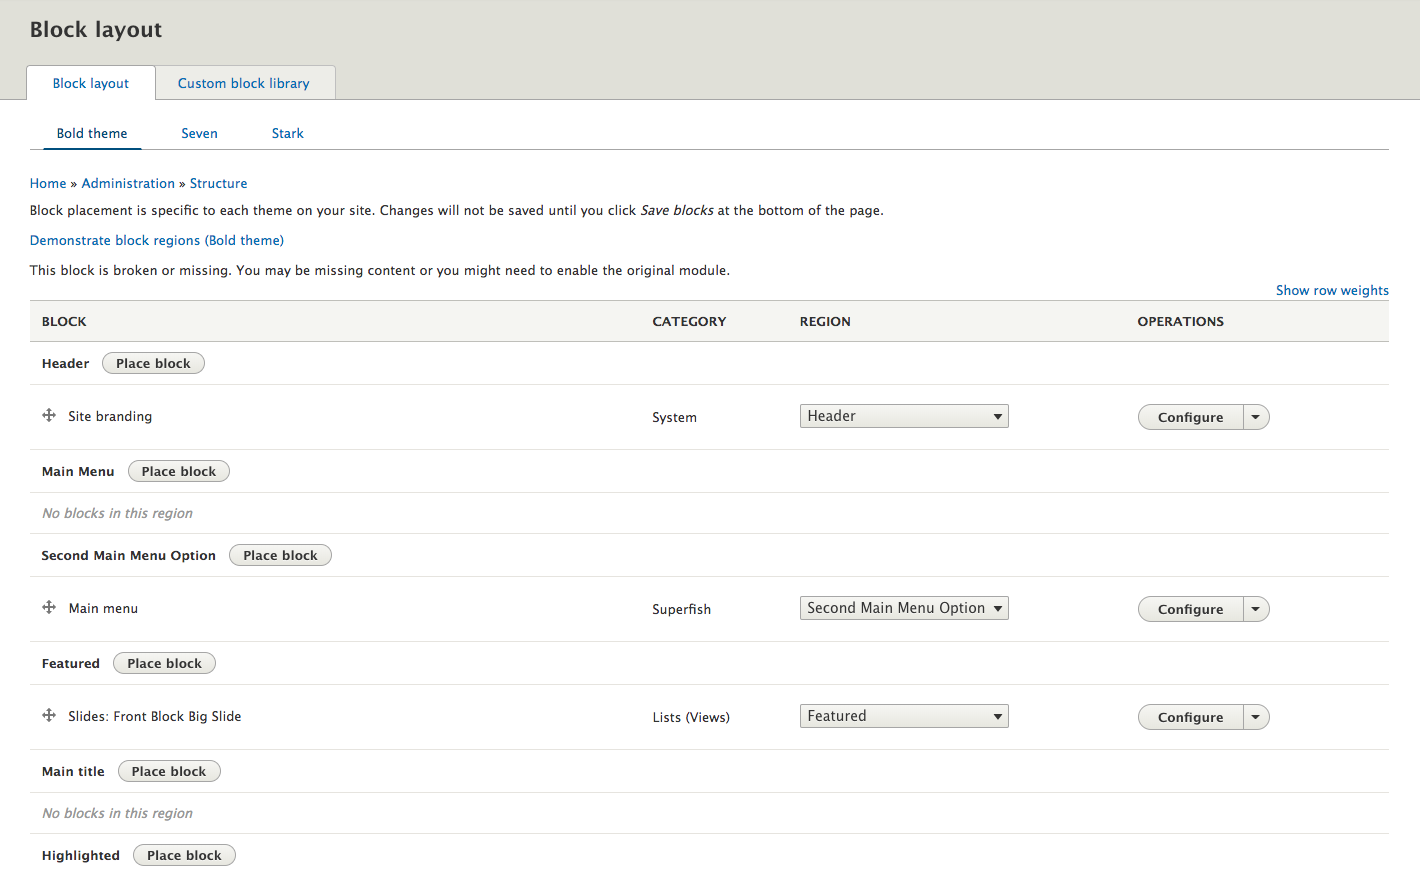
Step 2: Click 'Place block' on desired region.
Say we want to put something else entirely in the Tertiary Right Column region.

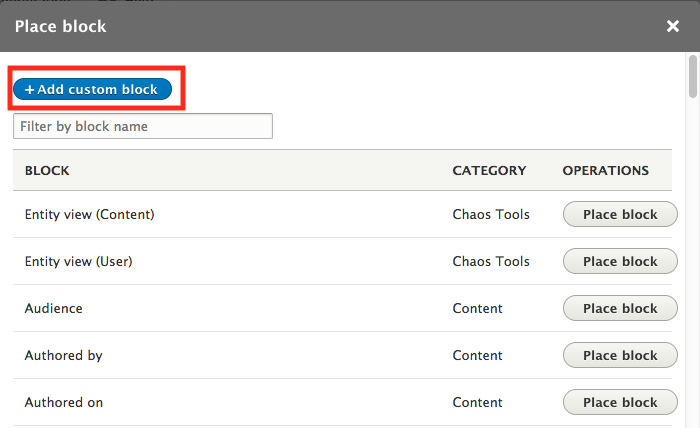
Step 3: Add Custom Block.
Click on Add Custom Block, and fill in the necessary fields.
Step 4: Select your block type.
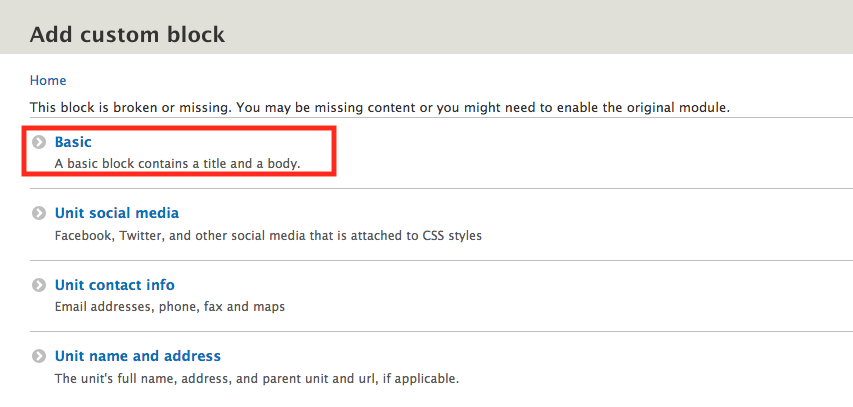
There are four types:
- Basic: This is what we're going to be using in this example. It's just a header and a text field, much like basic pages.
- Unit Social Media: This is to include social media icons throughout your site. We typically use this in the departmental footer.
- Unit Contact Info: This is formatted to allow you to include contact information. We typically use this in the departmental footer.
- Unit Name and Address: This is formatted to allow you to include name and addresses. We typically use this in the departmental footer.
Click on Basic.
Step 5: Fill out the necessary information.
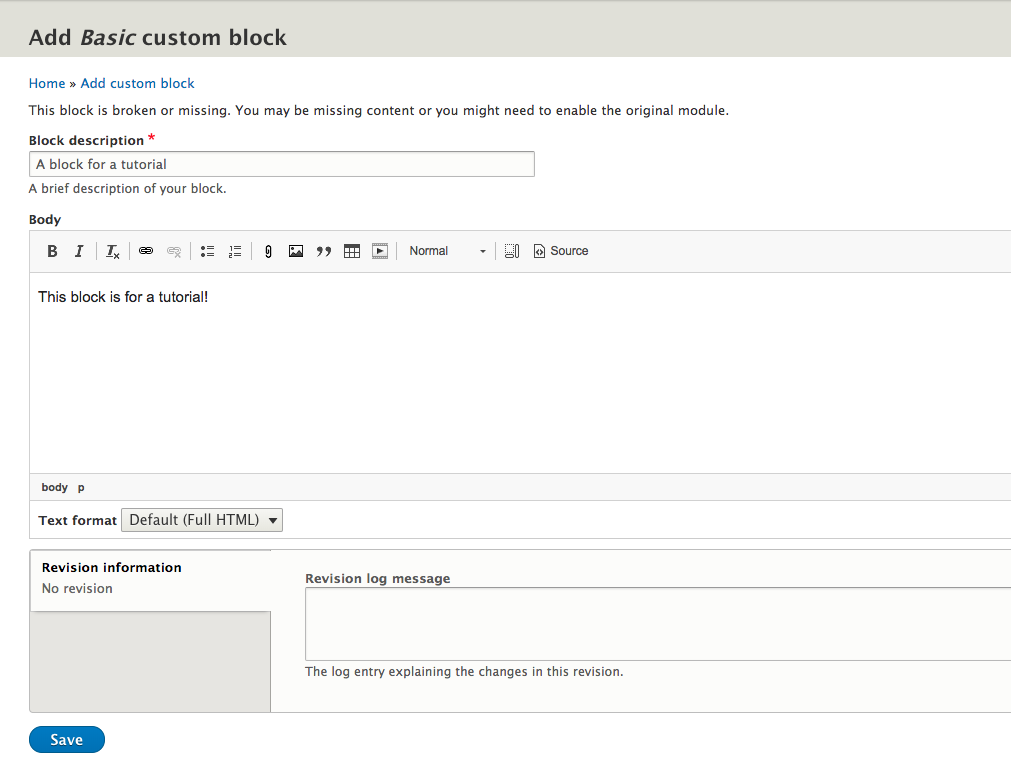
Step 6: Click save!
After you save, this screen should pop up.
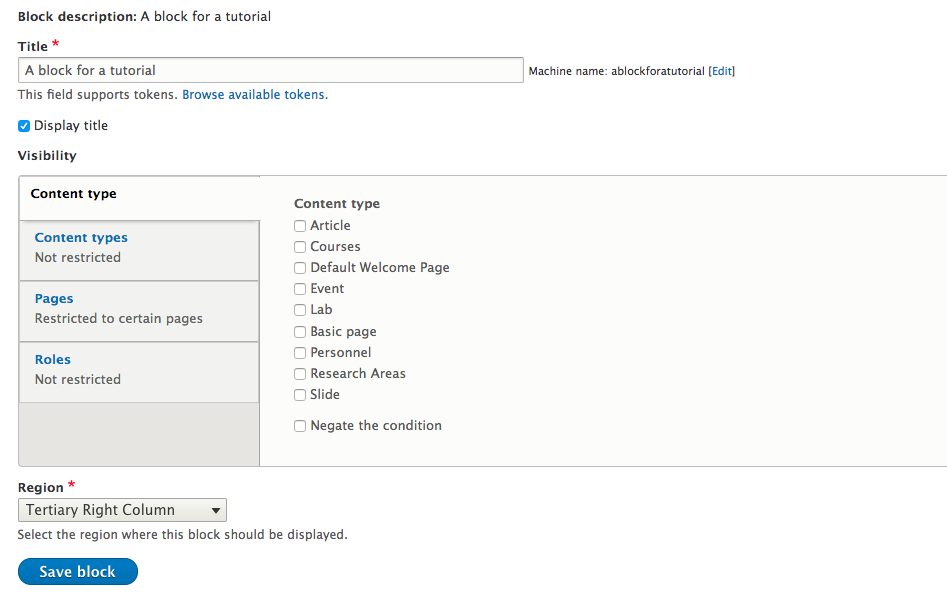
This window is all about how to display the block and where.
Step 7: Select your region, and which pages you want this block to be displayed in.
Go ahead and select the desired settings under Pages. This is the only tab you'll need to worry about when it comes about where to display your block.
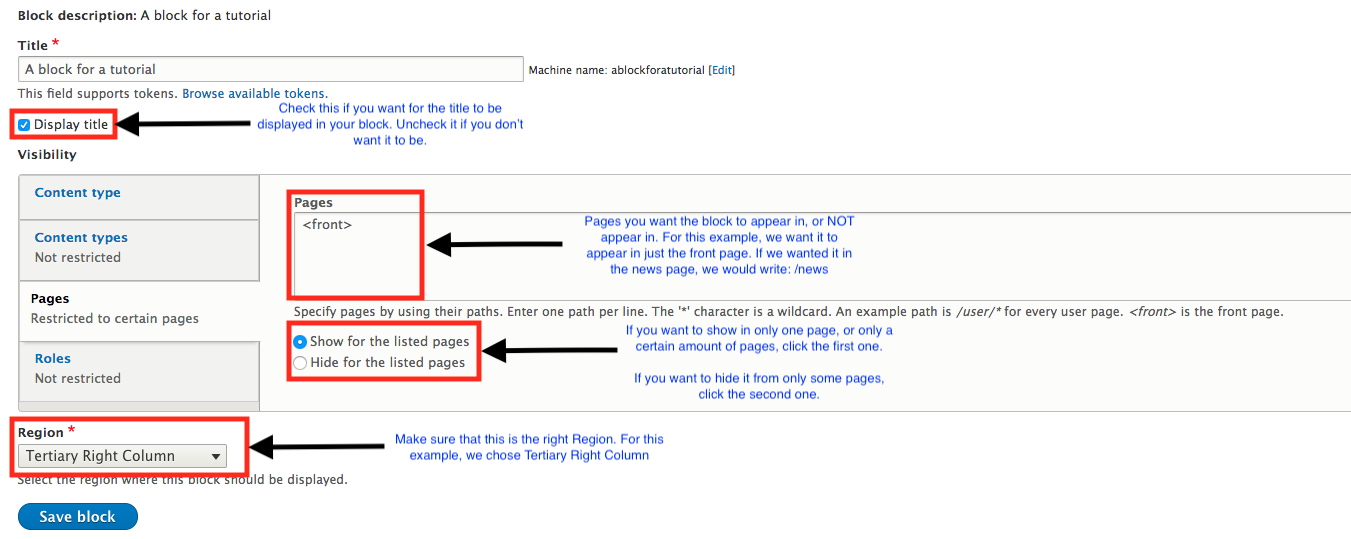
Step 8: Click Save block.
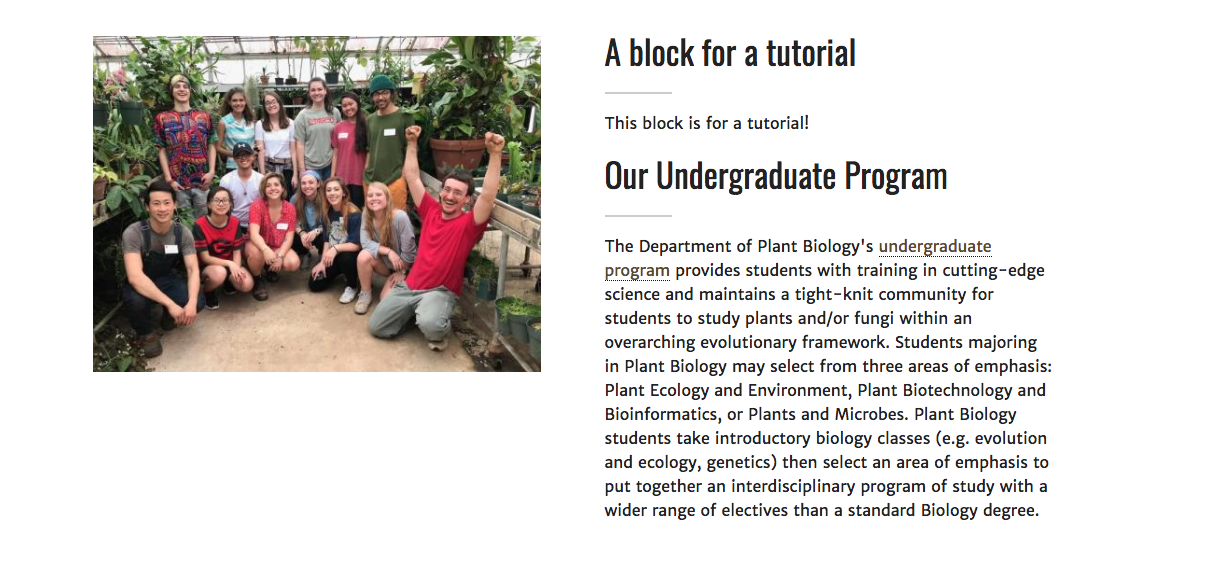
And now the block should appear on your Block Layout page.

And on your front page!
Disabling Blocks
Now that you've added a new block, and you realized it looks kind of weird with the old block that's already there, you want to disable the old one so only the new block is visible for the people who visit your site.
Step 1: Go to the Block Layout Page
Reference the previous section for a detailed description on how to get to this page.

Step 2: Find the desired block to disable.
The block we're looking for is Our Undergraduate Program. It's located in the Tertiary Right Column region. Once you find it, click on the little down arrow next to 'Configure'.

Step 3: Click on Disable.
Once the list pops up, click on disable.

Step 4: Click on Save Blocks.
Scroll down onto the bottom of the Block Layout page and click save. This should save your changes.
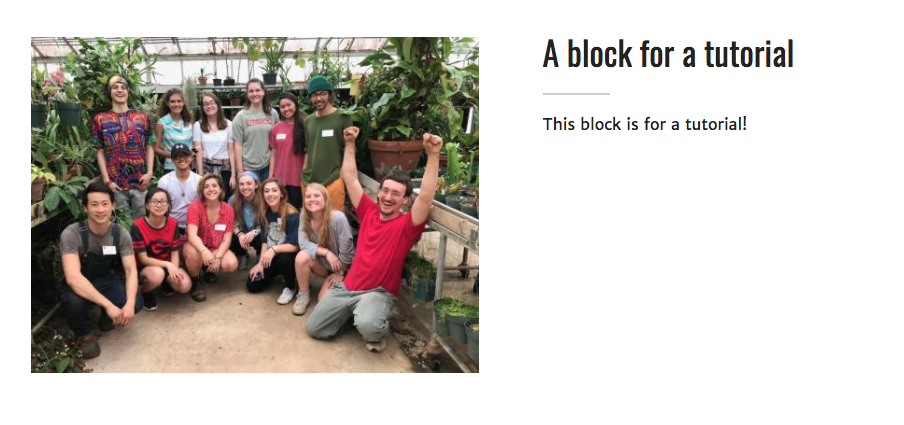
Step 5: Check on the front page
And the block should be gone!
Enabling Blocks
If there's a block that's been disabled and you want to enable it again, follow these steps.
Step 1: Go to the Block Layout Page
Reference the previous section for a detailed description on how to get to this page.
Step 2: Find the desired block to enable.
The block we're looking for is Our Undergraduate Program. It's located in the Tertiary Right Column region. Notice how it says 'disabled' next to the block name.

Step 3: Click on Enable

Step 4: Click on Save Blocks.
Scroll down onto the bottom of the Block Layout page and click save. This should save your changes.
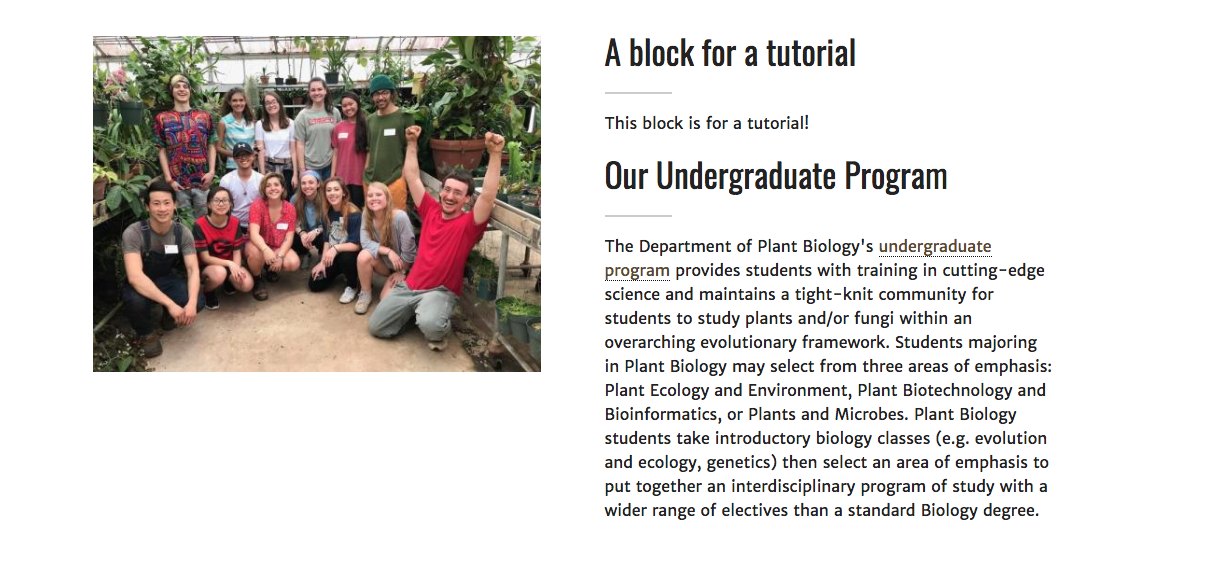
Step 5: Check on the front page
And the block should be back!
To manage any part of your web site, you will have to be logged into the Drupal CMS. If you need help logging in, please review this login help document.
Monday - Friday 8:00 a.m. - 5:00 p.m. Homepage & Directory Service Offerings Franklin OIT Status http://status.franklin.uga.edu/ Receive or Discontinue Status and Service Updates from Franklin OIT UGA/EITS Systems Status Pages https://www.facebook.com/uga.eits USG Systems Status PageContact the Franklin OIT Help Desk
Hours of Operation
Website Information
Systems Status Information
